HOW TO EXPORT DATA FROM YOUR MLS
- Navica
STEPS TO EXPORT DATA FROM YOUR MLS
1. Create the Custom Export by adding the required fields.
Before you can export data, you must first setup the Export
format.
This is a one-time action that you will need to do.
Once you have created your export format you will not need
to do this again and you can skip this
section.
When you create your export format, it must be setup exactly as
shown in this section for the Focus 1st
application to understand the format.
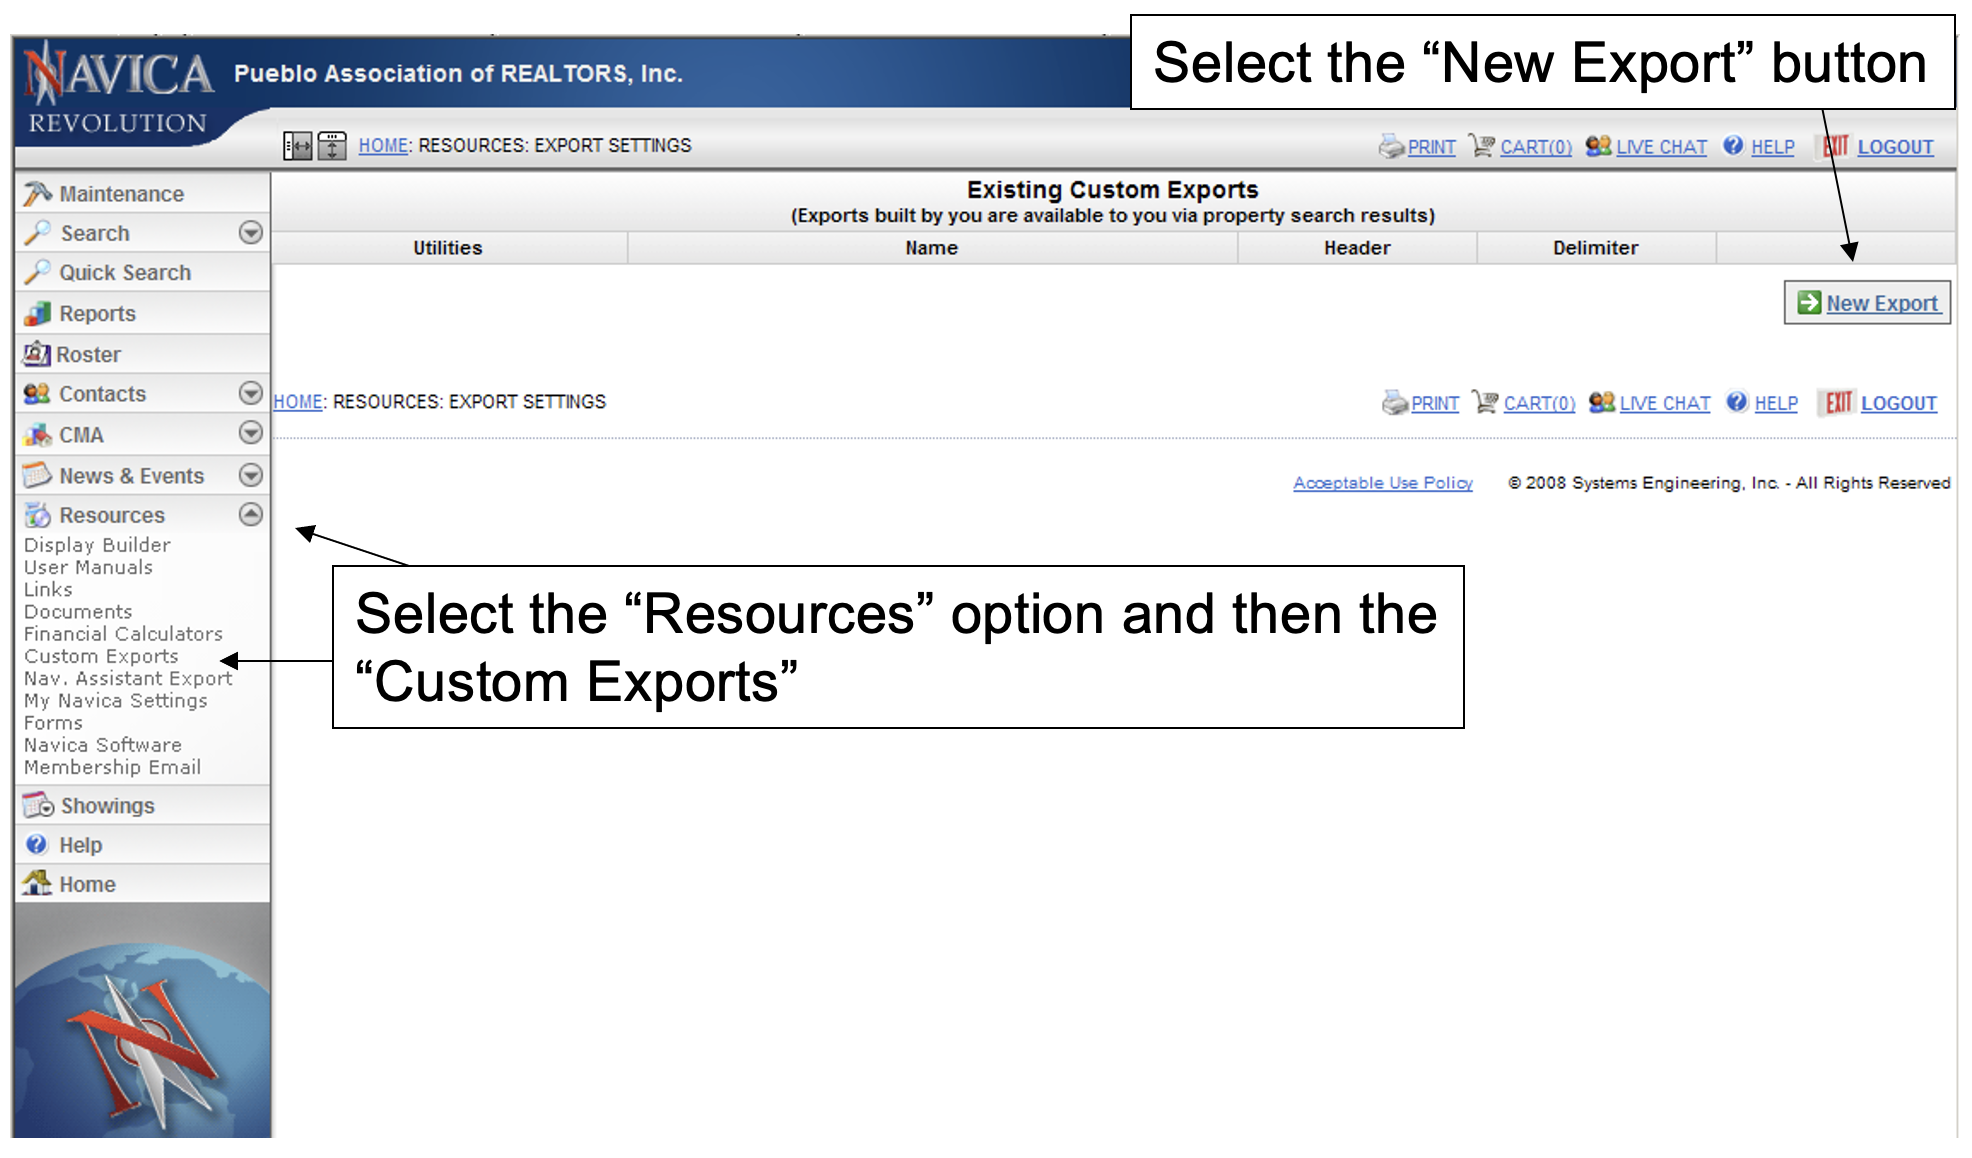
Once you've logged into the Navica system,
using the menu on the left side of the screen,
select the RESOURCES drop down
option.
Then select the CUSTOM EXPORTS
option.
Once you select the CUSTOM
EXPORTS option,
the EXISTING CUSTOM EXPORT
screen will be displayed as shown below.
Now select NEW EXPORT button,
located at the top right of the screen to create a new custom
export.
Once you've selected the NEW
EXPORT button,
the EXPORT SETTING SETUP(1)
screen will be shown.
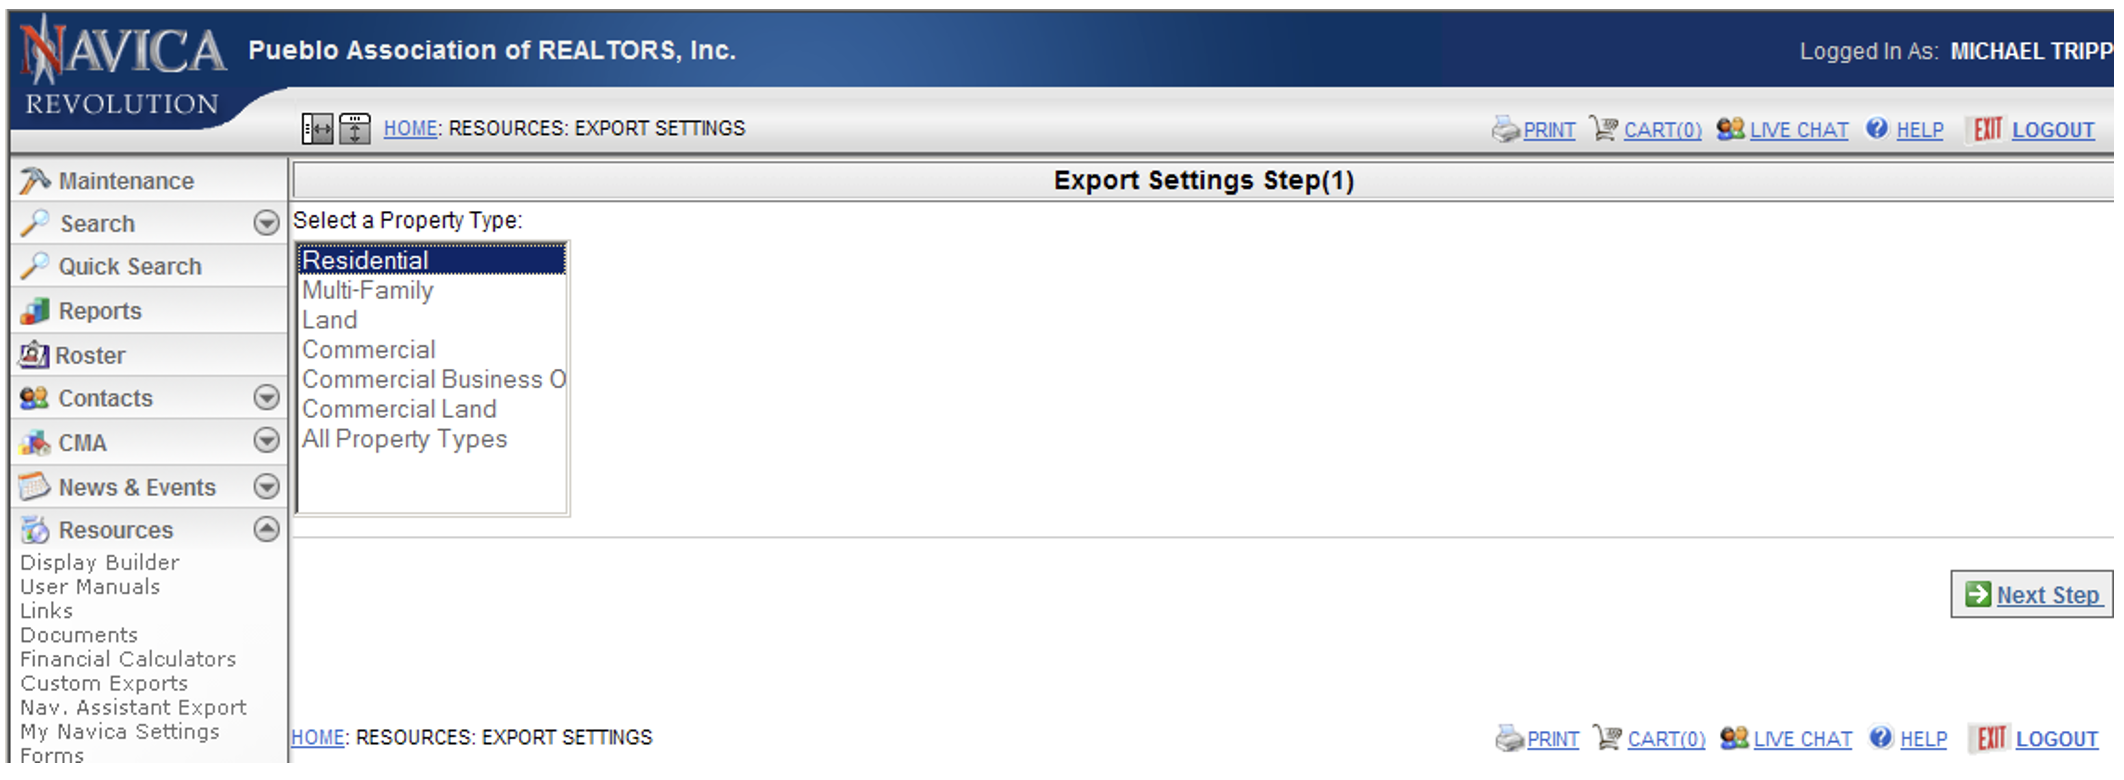
Select the RESIDENTIAL option
and then
press the NEXT STEP button.
You will see the EXPORT SETTING
STEP(2)
screen as shown below.
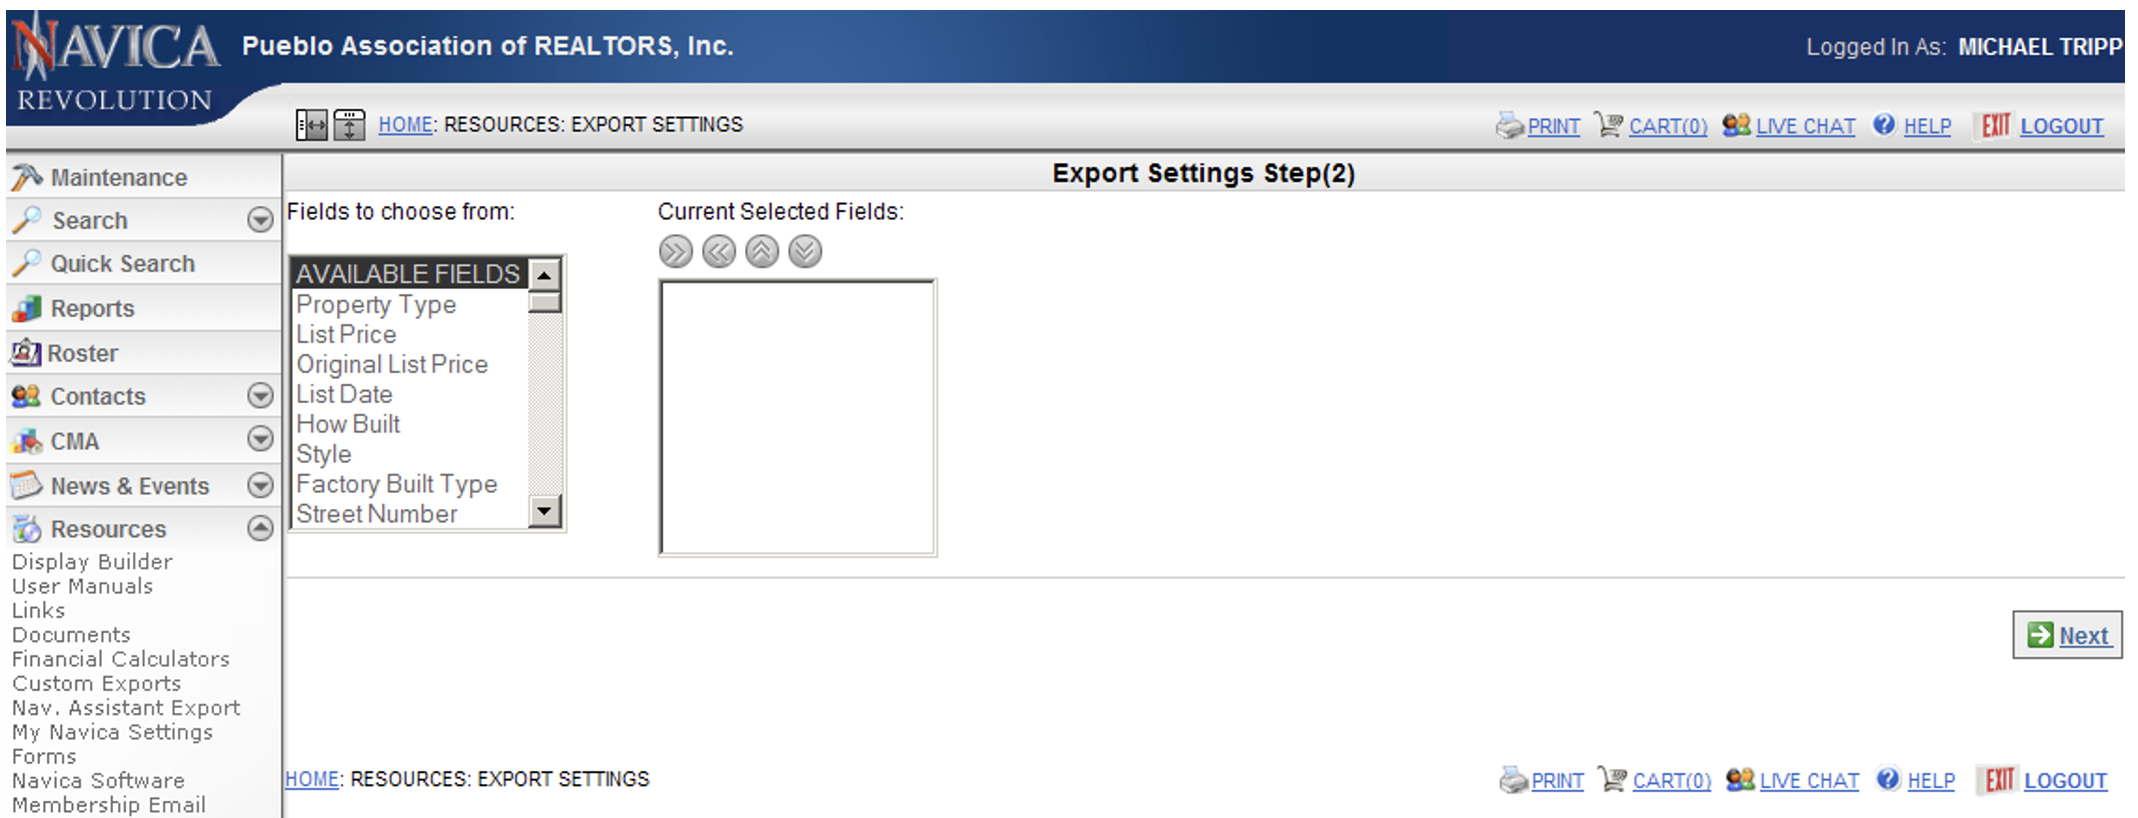
In Step(2), you will need to define the fields for the new
Export format (also referred to as Export
Definition).
Doing the following will ensure the Custom Export includes
the required fields for the software to
provide accurate results.
- Select ALL the field names to be selected from the
FIELDS TO CHOOSE FROM
table (on the left),
and add the fields to the CURRENT SELECTED FIELDS
table (on the right)
by pressing the >>
button.
- You can select all fields by first selecting one of the
fields,
and then by holding the "control" key and pressing the
"a" key on a PC,
or by holding the "command" key and pressing the "a" key
on a MAC.
- You will see all the fields selected move to the table
on the right.
Once you have added all the fields,
press the NEXT STEP button to
go to the
EXPORT SETTING STEP(3) screen.
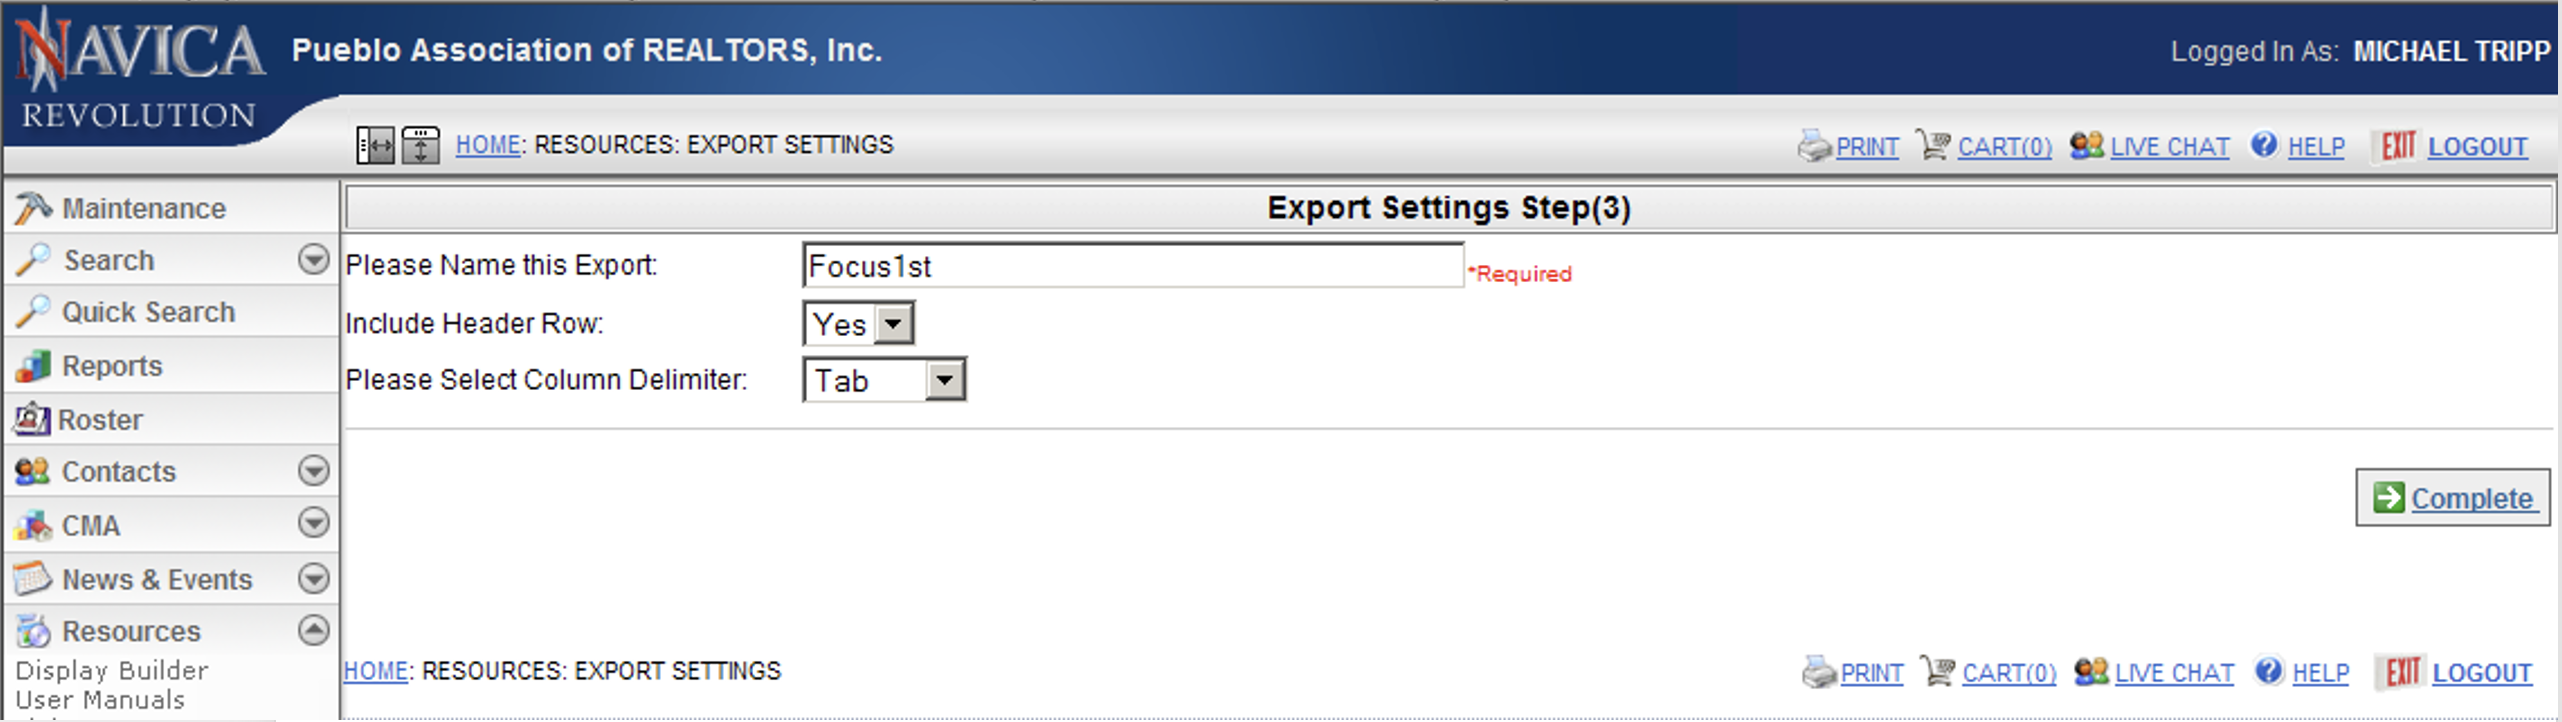
- Place the name “Focus1st" as the FILE EXPORT NAME as shown
above.
- Select "Yes" for the INCLUDE
HEADER ROW option.
- Select "Tab" for the COLUMN
DELIMITER option.
Once you've provided the Name and selected the options above
press the COMPLETE button.
You are now ready to do your MLS search and export your results.
2. Create your MLS search
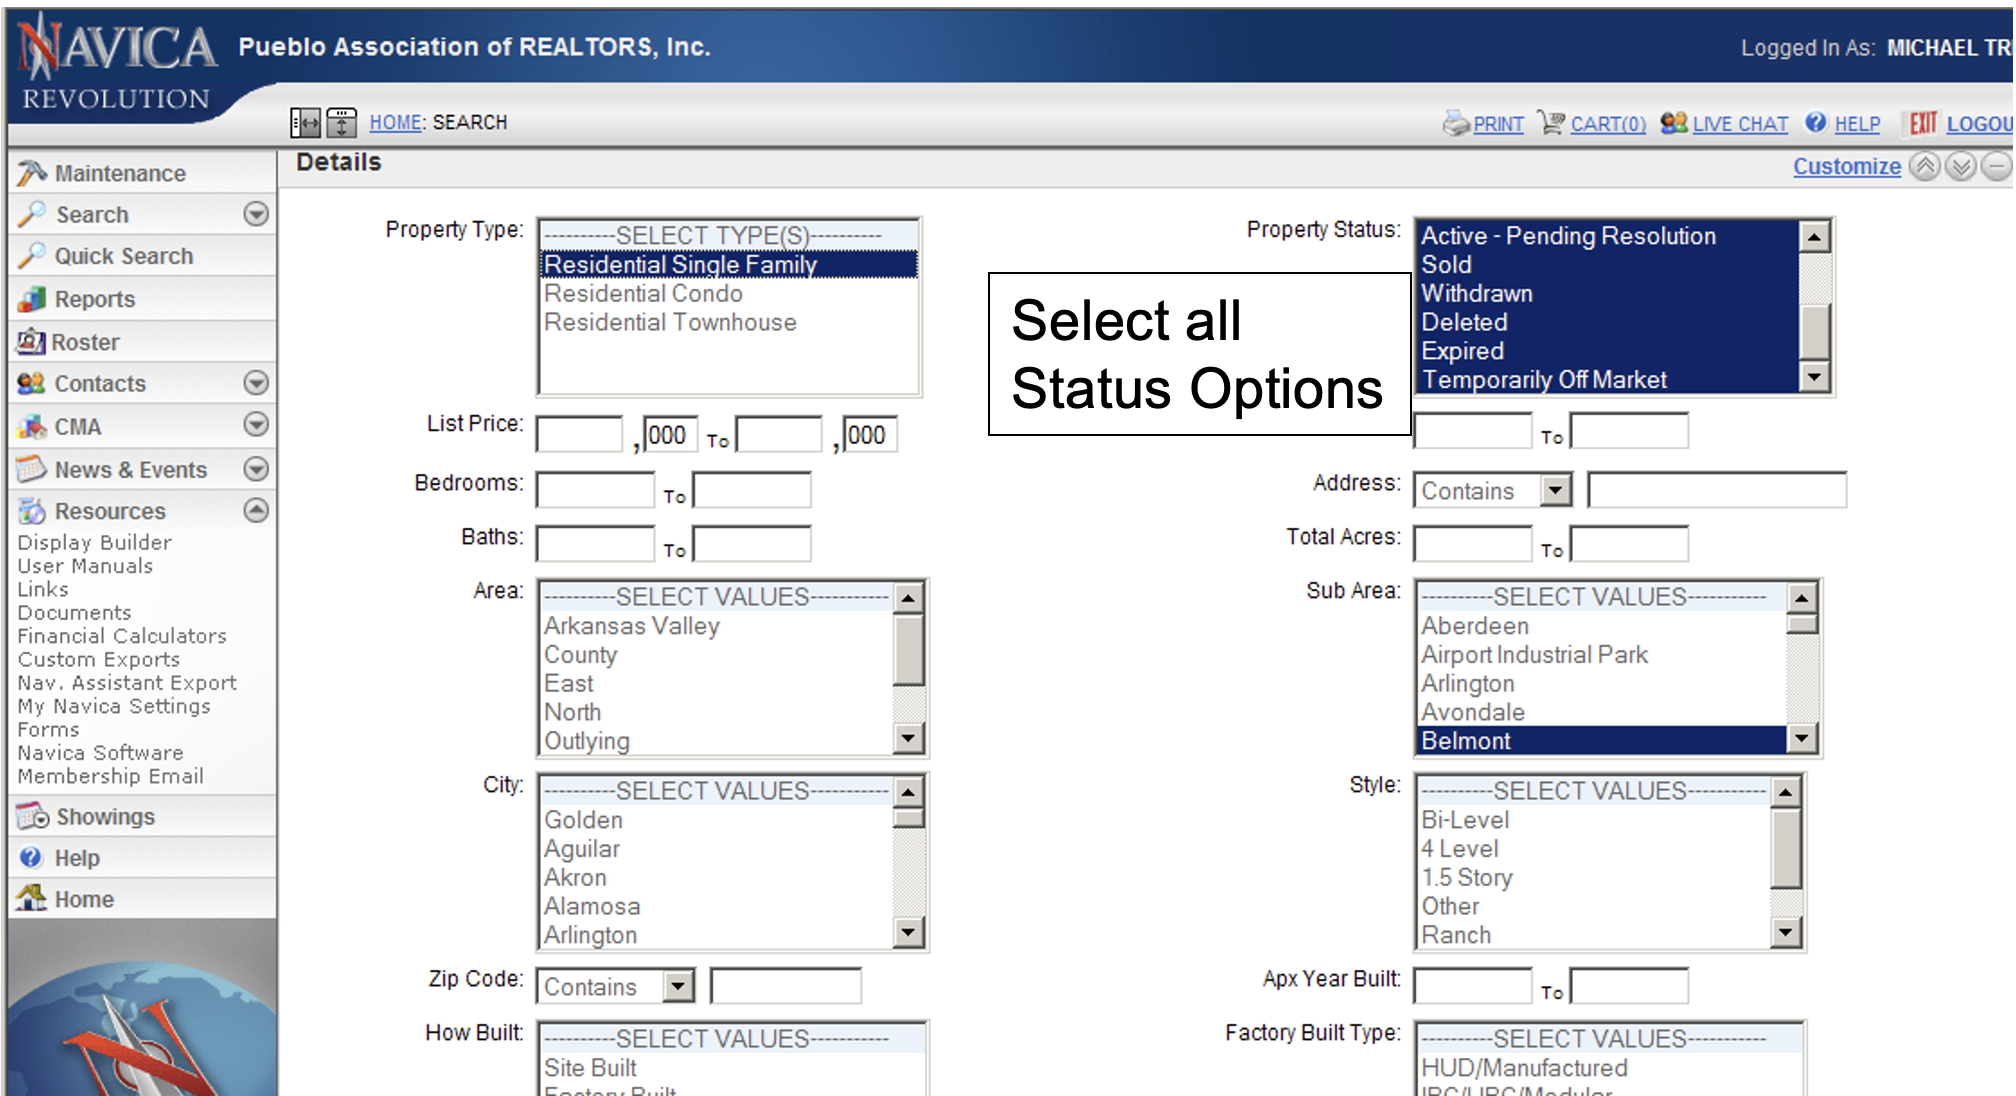
In selecting data, make sure that ALL status
options are selected.
Selecting all status activity will ensure that all the data
needed to create the graphs is collected.
Additionally, you will need to select the "Closed", "Withdrawn",
and "Expired" dates to be two years
back.
When searching for all status activity for the last two years,
your search results should be in the 50 to 100 comparable
properties range (this is a rough guideline).
If you have slightly less than 50 that works, or a little above
100 is fine as well.
You should also make your normal selection choice by selecting other
options that you would normally select
in doing a CMA.
For example, options you would normally use when doing a CMA,
could include a map search (using a polygon), subdivision or
neighborhood,
city, zip code, lot size (<.5 acre, 1-5 acres, etc. ), on water.
Looking at activity in specific subdivisions is also good
starting point. For your initial search you want to focus on
location (location, location) and add in unique features (only
if necesssary). To view a short tutorial on how to do an
effective search to use in your Focus 1st Pricing, select
this link.
Once you've selected the search criteria, press the SEARCH button
to see the results as shown below.
When searching for all status activity for the last two years, your search results should be in the 50 to 100 comparable properties range (this is a rough guideline). If you have slightly less than 50 that works, or a little above 100 is fine as well.
3. Export your results
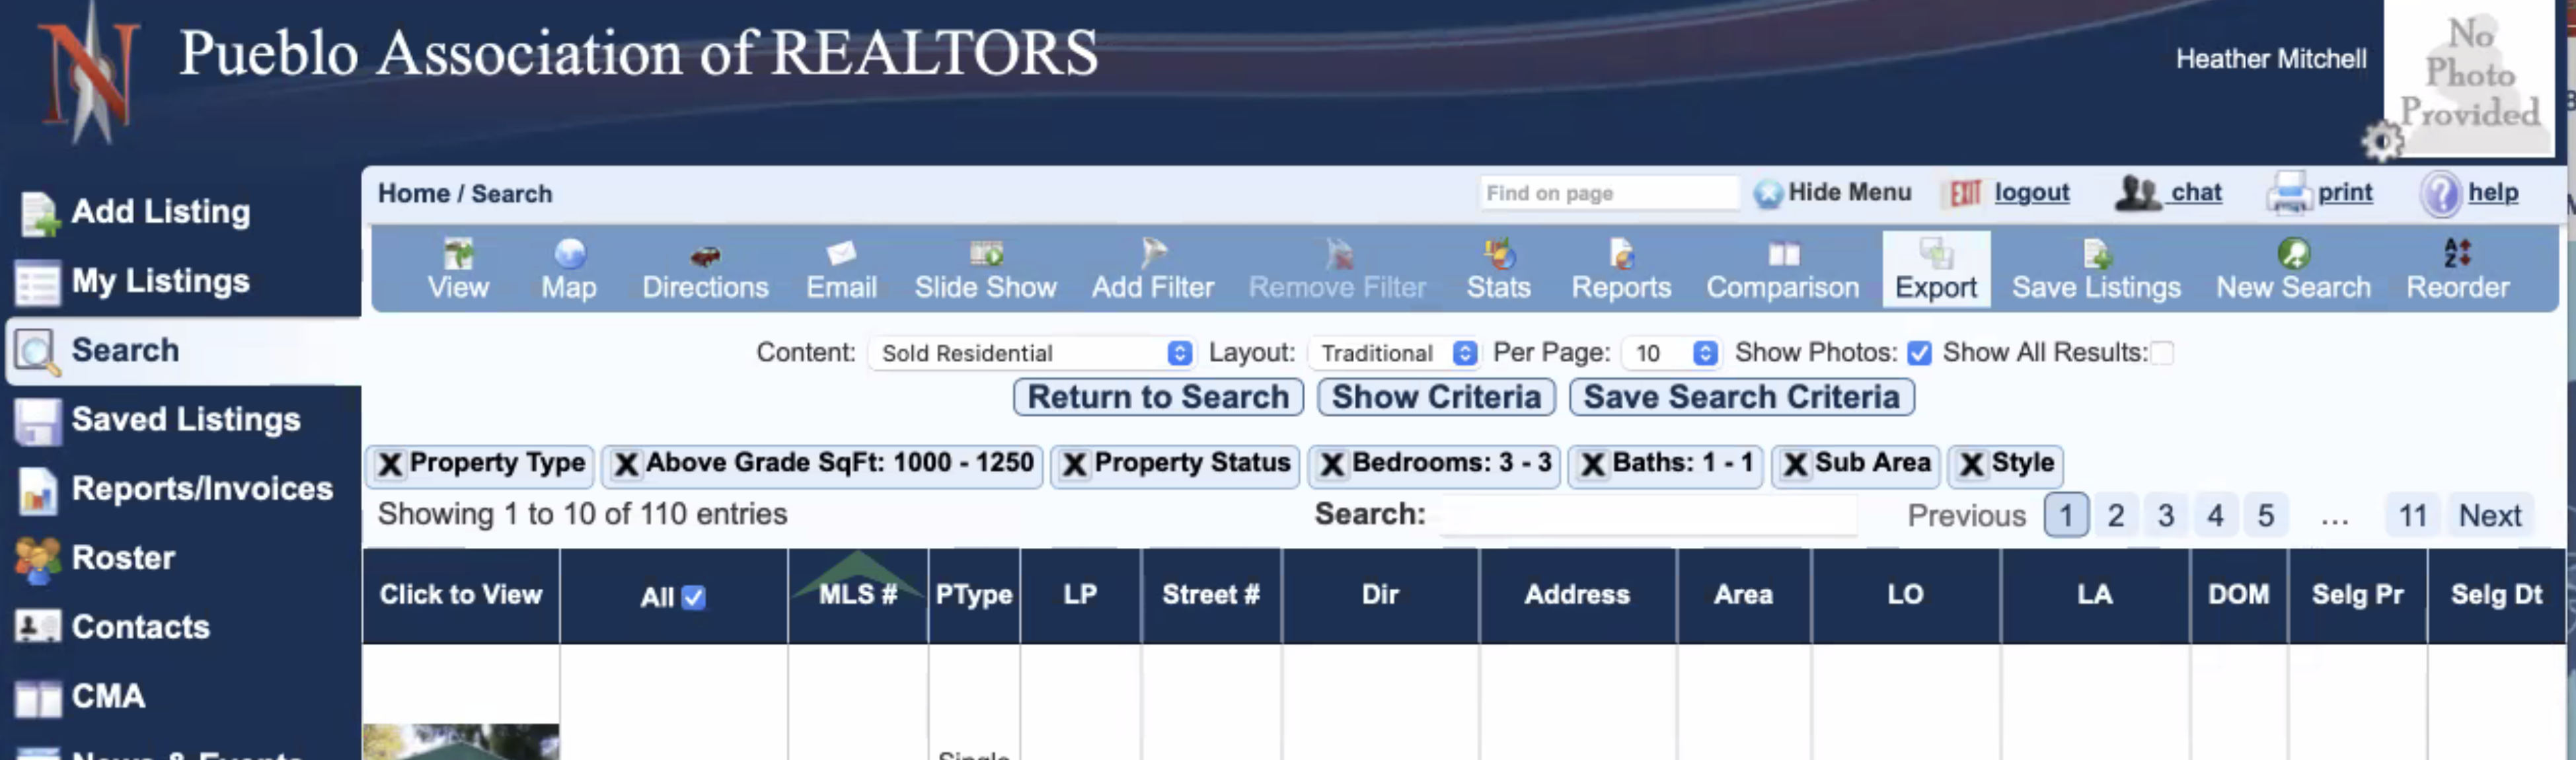
To export the results,
first select the All box located
just above the search results.
This will allow you to export all your search results.
Next select the Export button which
is located just above in the
menu bar (see graphic above).
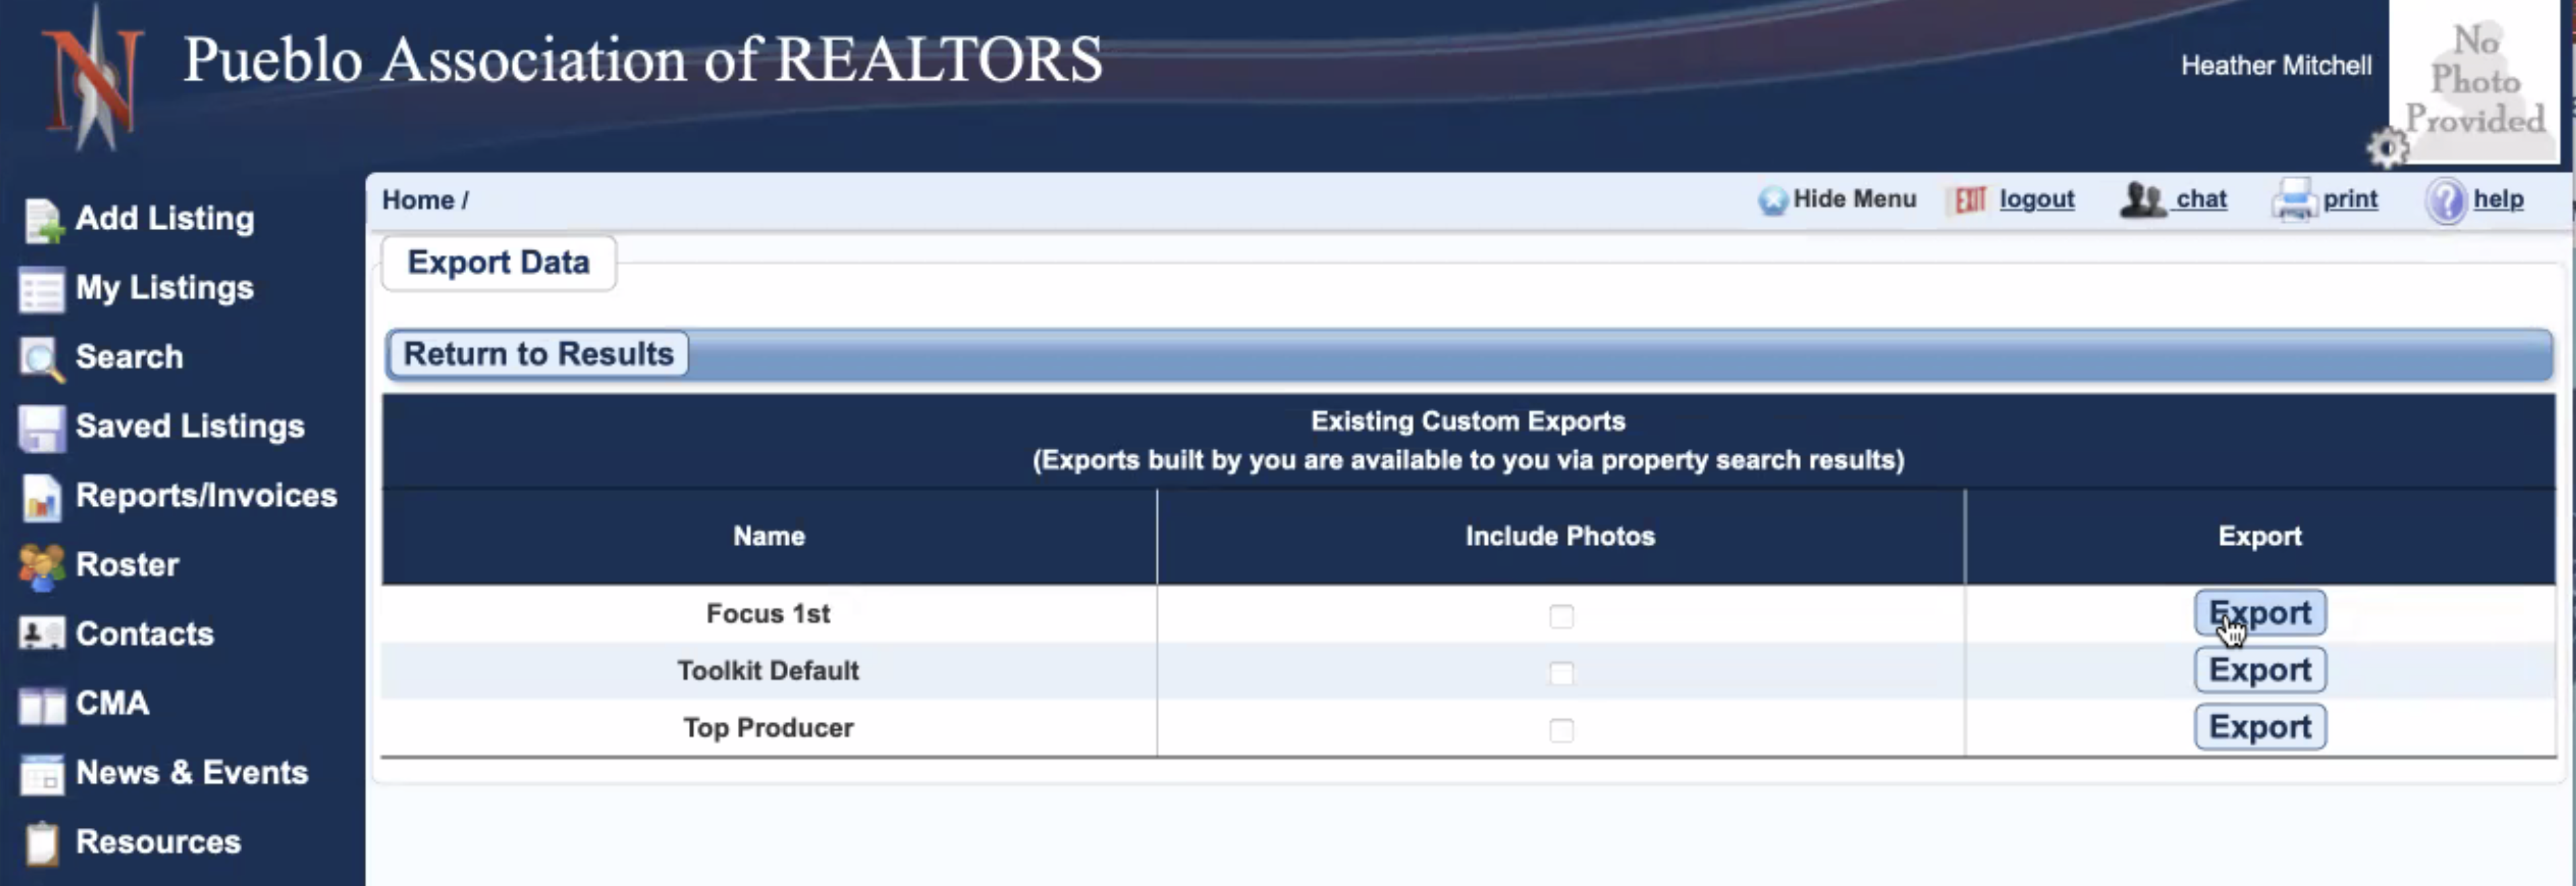
Once you've selected the Export
button you will see a screen
similar to that shown below which is showing all the Existing Custom Exports .