Exporting
Data from IRESIS – Northern Colorado
Using IRESIS to
Increase Listings in Grid
Before
you start exporting data, you must first increase the number of listings in the
Grid. The IRESIS default is to limit the
number of listings in the Grid to 250.
This means you will only be able to export 250 records. The procedure below shows you how to increase
the number of listings in the Grid to 400 (the maximum allowed). You will only need to change the setting one
time.
After
you login, use the downarrow left of your name
to see the options shown below. Note that
when you login, you name will be located at the top left of the IRESIS
screen.
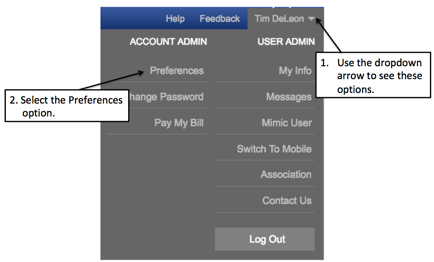
Once you have the options displayed, select the “Preferences”
option. Once you do that you will see a
screen comparable to that shown below.
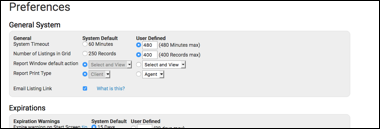
When
you have this screen showing, find the “Number of Listing in Grid” option. Place ‘400’ in the blank box and select it as
shown below. Then accept the changes by pressing
the “Save Changes” button located at the top left of the screen. ![]()
You
are now ready to export data.
IRESIS
In
selecting data from IRESIS be sure to select the options below:
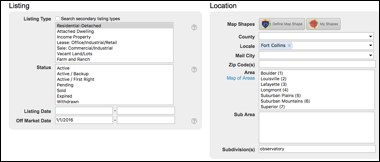
On
the “Status” option select the all the status options. Note that if you leave them all off, the
system will default to select them all.
Additionally, place the “Off Market Date” of 1/1/2016 to collect data
from the last two years (this assumes that we are currently in the 2018
timeframe). Notice in this example we
are looking for all the activity in the respective subdivision. Once we press the Search button, we see the
result screen.
Export and Saving
Data to a File

Notice
that we have circled the “export” function.
The export function will be used to export data to a file. When you select the export function (by
pressing on it) the following dialog box will be displayed.
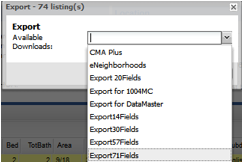
There
are several different export formats that you can select. To see all the different export formats,
press the “down arrow” button. ![]()
When
you press the down arrow button you will see several choices. Select the “Export71Fields” option.
Once
you have selected the Export71Fields
option you are ready to save the file.
Press the “Export” button to
save the file. When you press the button
the following dialog box will be displayed.
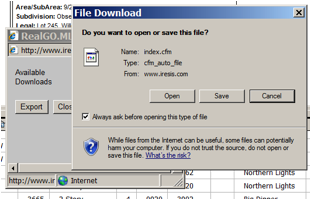
Press
the “Save” button to save the
file. You will be able to save the file
to a location on your computer. The file
will be saved as a “.TXT” file type.
You
will need to remember where you saved this file (and the name of the file) when
you use the Focus 1st Application.
In most computers the file will be saved in your download
directory.
Now
that you have saved the results of your search in an export file, you are ready
to run the Focus 1st application.